Sunday, March 4, 2012

Crockpot Sliders = Messy Goodness!

Here's another Pinterest find.  I made these to celebrate Matt's last basketball game of the season and coincidentally it was a cold, rainy day, so what a wonderful thing to come home to!  I think I said it before, but warm, delicious smelling crock pot food is the BEST thing to come home to!


Slow Cooker Pot Roast Sliders
1 3-4 lb beef roast (we used 2 smaller beef arm roasts)
1 cup water
1 cup salsa
1 envelope onion soup mix
1 envelope Italian dressing mix
1 envelope Au Jus mix (I couldn't find  this in the stores so I added another envelope of Beefy Onion Soup Mix and a cap full of Worcestershire)

Whisk together water, salsa and seasoning packets. Place roast in slow cooker. Pour seasoning mixture over roast. Cook on low for 8-10 hours, or high for 4-5 hours.
To make the sliders, we sliced a regular bakery hamburger bun and laid 1 slice of either Swiss or Provolone cheese onto 1 side then broiled the bun, open-faced, and broiled for a few minutes on a pan.
Then add a few fork fulls of the roast, grab a BUNCH of napkins, and enjoy!!!

Homemade Granola and Bars

My husband is a big granola and granola bar fan - I think he learned how to make homemade granola in high school and that's where I got this idea.
We love to add granola to our yogurt for lunches and we often buy boxes upon boxes of granola bars for afternoon snacks, lunches, and such - so why not try making my own???

I found this granola recipe on Pinterest and it was very simply - you can basically add whatver you want.  I doubled the granola recipe but then made the mistake of baking it all together - make sure you bake the granola in a SINGLE LAYER on a baking sheet or pan.


Applesauce Granola - (I doubled the recipe to last us longer - this is the single recipe below)
2 1/2 cups old fashioned oats
1 cup nuts (pecans, walnuts, almonds) - I used sliced almonds.
1/2 cup sunflower seeds
1/4 cup sesame seeds
1/4 cup brown sugar
1 teaspoon cinnamon
1/2 teaspoon salt
1/2 cup unsweetened applesauce
1 tablespoon honey
1 tablespoon vegetable oil
1/3 cup raisins
 
Preheat oven to 300F.  In a large bowl, mix together oats, nuts, sunflower seeds, sesame seeds, brown sugar, cinnamon, and salt. Set aside.
In a small saucepan, warm the applesauce with the honey and oil over low heat.
Mix the applesauce mixture into the oat mixture and stir to coat everything. Spread the mixture onto a 9 x 13 baking pan - remember, SINGLE LAYER works better.
Bake for 45-50 minutes, stirring every 10 minutes, until the granola is a deep brown. Remove from oven and stir in raisins. Cool completely before enjoying.

Simple right? - After I made the granola, I used some of it to make granola bars.  You could also buy plain granola to use in the bars, which is what i'm going to do this week because I don't have any more homemade granola left.


Chocolate Chip Granola Bars
4 tbsp. (1/2 stick) unsalted butter
1/4 cup packed light brown sugar
1/4 cup honey
2 cups plain granola
1 cup rice cereal (Rice Krispies, etc.)
1/4 cup semisweet chocolate chips (I used the mini-chocolate chips)
Optional: 1/4 cup peanut butter chips (didn't have these so I didn't use them)

Line two 9×5 loaf pans with foil or parchment. Lightly butter or spray the foil. Set aside.  I used only 1 loaf pan and the bars were just a little too big but I though 2 pans would make them a little too small - it's your call what you want to do.
Combine butter, honey and brown sugar in a large saucepan over medium heat. Stir until the butter is melted.  Bring the mixture to a boil, then lower the heat to medium-low and simmer until the sugar is dissolved, about 2 minutes. Remove the saucepan from the heat.
Add the granola and rice cereal into the saucepan and fold them into the sauce until evenly coated.
Spread the mixture into the prepared pans and press firmly with a spatula to evenly fill. Sprinkle the chocolate and peanut butter chips onto the top of the granola and gently press them down with the spatula.  (I used a large potato masher - shown in the pics - to press the bars - I thought it worked really well!)
Let sit at room temperature for 15-20 minutes or until mostly cooled and set; lift out of the pan and cut into bars.  I wrapped them individually in cling wrap - you could put them in plastic baggies or find some brown paper - parchment paper and wrap them a little cuter with twisted ends - whatever works for you.

Now aren't those simple recipes!? - besides baking the granola, it takes no time at all!  Delicious and healthy - I prefer making my own granola bars now because I know exactly what went into them and can design them to my taste! :)

Monday, February 20, 2012

Quick, Tasty Breakfast

No school today for President's Day so Matt and I had a nice brunch when I got back from the fitness center and a hair appointment.
Now, this is going to sound contradictory - fitness center and brunch (not a healthy one at that), but come on, you can't eat healthy EVERY minute of the day, it just doesn't work.
So, if you're looking for a healthy breakfast, this is not your recipe.  If you're looking for a quick and tasty breakfast, this is your recipe!  If you're looking for a new idea that can be altered to your specific tastes, this is also your recipe!

Waffle Iron Brunch - (sorry no pictures)

Hash browns on the waffle iron is a fantastic idea!  You can add whatever you want - onions, peppers, cheese, etc. 
We made frozen hash browns with cheese and seasoning.  Spray the hot waffle iron with cooking spray to prevent sticking.  Add a handful of hash browns, season, and add cheese.  Add a few more hash browns to cover the cheese and tightly close the waffle iron.  Cook for a few minutes until browned and slightly crispy.

Cinnamon rolls on the waffle iron is another fantastic idea!  Takes a lot less time than the oven!  Place 2-4 of your favorite refrigerated cinnamon rolls on a hot, sprayed, waffle iron.  Tightly close and cook a few minutes until cinnamon rolls are lightly browned.  Serve with the frosting that comes with the rolls or with maple syrup or both!

Now don't go making this breakfast/brunch every day, or every week, probably not good to do that - but do enjoy it every once in awhile - we did!

Sunday, February 12, 2012

Homemade Chinese!

It was quite the Friday at school, and honestly, quite the week at school so I needed something to kick the weekend off on a good foot.  Matt left for an Augustana Basketball game so I had the house to myself! - including the kitchen, living room, and TV!  I decided to try a new Chinese recipe.  We make a lot of stir fry's and such, and this is a take off a recipe I found in one of my Taste of Home Magazine.  Of course I added some things and replaced some things, and it turned out great!
What a wonderful start to the weekend!


Cashew Chicken with Noodles
1 lb boneless skinless chicken breast, cut into pieces
2 Tbsp cornstarch
3 Tbsp minced garlic
1/4 cup soy sauce
1 Tbsp peanut oil
1 Tbsp sesame oil
1 cup chopped celery
1 cup chopped cabbage
6 green onions, cut into 2 inch pieces
1 pkg Rice Noodles - thick would be better, but I only found the "rice stick" thin noodles
3 Tbsp Teriyaki marinade (the recipe called for chili sauce but we were out)
1 cup unsalted cashews


Combine cornstarch, minced garlic, and soy sauce in medium bowl.  Add chicken and stir to coat.  Heat peanut and sesame oil in large skillet and add chicken mixture.  Cook until chicken is just about done, then add celery and cabbage - cook until chicken is done.  Meanwhile, cook noodles according to package directions.  Add green onions to chicken skillet and cook additional minute.  Then, add cooked noodles, marinade, and cashews - heat through.  Be sure to turn the noodles so they get completely covered in chicken mixture and marinade.
I used cabbage and celery because it's what we had in the fridge and it's my 2 favorite stir fry vegetables, but you may omit these or add something else - like water chestnuts or carrots or broccoli.

I also need to talk about these new bowls I bought from World Market - aren't these perfect!!??  The Yin and Yang bowls are perfect for our Chinese dishes! :)

Another Pinterest Find - S'more Cookies

Made these cookies for Super Bowl Sunday and they were a huge hit!  I've made s'more bars before but these cookies are something different.  The batter is very sweet with Honey Graham Crackers in it.

I actually cut the recipe in half when I made the cookies and it still made about 2-3 dozen.


S'more Cookies
3 sticks cold butter, sliced
1 cup sugar
1-1/2 cups brown sugar
2 eggs
2 tsp vanilla
4 cups flour
2 cups graham cracker crumbs(I used the honey kind)
1 tsp salt
1 tsp baking soda
mini marshmallows
2 giant size chocolate bars (I used Hersey, but you could use anything)

Heat oven to 375.  Combine the butter and both sugars.  I did not soften the butter like I usually do and just beat it in the mixer to combine.   Mix in egg and vanilla until well combined.  Add flour, graham cracker crumbs, salt, and baking soda.  Place dough in balls on cookie sheet covered with parchment paper.  Bake for 8min, remove from oven, press in chunks of chocolate and marshmallows.  Put back in oven and back an additional 3min.  Let cool.

Friday, February 10, 2012

Italian Dinner with Dessert

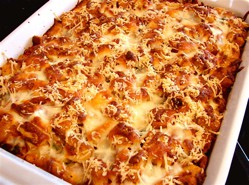
I found this recipe on Pinterest awhile ago and was waiting for a time when I needed to feed a few people in order to try the recipe.  The recipe on Pinterest has a great video tutorial that's really helpful for the Chicken Parmesan.  I really recommend watching it while you're cooking!


http://foodwishes.blogspot.com/2008/02/end-of-chicken-parmesan-as-you-know-it.html


Baked Chicken Parmesan
2 Tbsp Olive Oil
2 Tbsp minced garlic
Hot Red Pepper Flakes (I used a Hot and Spicy Mix I found at World Market)
6 boneless skinless chicken breasts, or as many as fit in your baking dish
2 cups marinara sauce
1/4 cup chopped basil - I used about 2 tsp dried basil because I didn't have any fresh
8 oz shredded mozzarella
4 oz Parmesan cheese
1 pkg garlic croutons (5oz)


Preheat oven to 350.  Mix the oil and garlic at the bottom of a 9 x13 baking dish - spread evenly out.  Sprinkle in some red pepper flakes - you don't have to do this if you don't like the heat.  Lay your chicken breasts in the baking dish and evenly cover with marinara sauce.  Sprinkle with chopped basil.  Add about half of your mozzarella and parmesan cheese followed by the croutons and the rest of the cheese.
Bake for 35-45 minutes or until thermometer in chicken read 150 (I think - maybe it's 170...I can't remember what chicken should be - check the tutorial I pasted above)


And of course, with the Baked Chicken Parmesan, I had to serve garlic bread. :)
This bread was fairly simple to make compared with some of the breads I have made.  It does need to time to rise so I baked it the night before I made this dinner, and then warmed it in the oven right before dinner with the cheese.


Cheesy Garlic Bread
1 cup warm water
1 Tablespoon Honey
1 envelope Active Dry Yeast (2 1/4 Teaspoons) - I would recommend using the Quick Rise Yeast - just works better!
1 teaspoon Salt
3 cups Bread Flour
Olive Oil, For Greasing Surfaces (I just used the cooking spray)
⅓ pounds Sharp White Cheddar, Or Any Other Cheese You Prefer (I recommend this kind - or mozzarella/Parmesan works too!)
½ cups Garlic Butter (I made my own with melted butter and minced garlic, then I added a little Parsley and Basil)

In a large bowl, stir water, honey and yeast together. Let yeast proof 5 minutes - unless you're using the Quick Rise Yeast, then it doesn't need to proof. Once you know yeast is active, stir in salt and the flour in 1/4 cup increments. If you are using a stand mixer, be sure to not increase your speed higher than a 2 or ‘stir’. Once dough starts pulling away from the sides and the bowl seems to be pretty clean, set a timer for 5 minutes and walk away. Let the machine knead the dough. After 5 minutes, dough should be smooth and tacky but when touched shouldn’t leave any dough on your fingers.
Grease the bowl and the dough. Cover with plastic wrap or a kitchen towel and let rise 1 hour or until doubled in size.
Punch down dough and cut into two equal portions. Form into two long baguettes the length of the cookie sheet. I like to twist mine because it looks cool, but it also keeps its length and doesn’t shrink. Cover with plastic wrap and rise 30 minutes. Start to preheat oven to 400 degrees F and place dough close to the oven where it’s nice and warm. Once oven is preheated, remove plastic wrap, from the dough reduce oven to 350F, put the bread into the oven and bake 20 minutes.
In the meantime, slice the cheese into thin slices and melt the butter.
Pull loaves of bread out of the oven after 20 minutes and brush with the melted garlic butter. Bake another 5-7 minutes or until bread begins to turn a golden brown. Remove from oven and cool 15 minutes.
Cut 1-inch slices 3/4′s of the the way through the loaves. Brush garlic butter in between each slice and fill with a slice of cheese. Bake another 3-5 minutes or until cheese is completely melted.


And finally, the dessert!!!  Tried this with some Valentine m&ms!


Samoa Bars
10 tablespoons unsalted butter
1 cup packed dark brown sugar
1/4 cup granulated white sugar
1 large egg
2 teaspoons vanilla extract
1/4 teaspoon kosher salt
1 1/4 cups all-purpose flour
1 1/4 cups sweetened flaked coconut
1 1/4 cups mini M&M’s (I used regular m&ms - Valentine Day colors!)
a few extra M&M’s


Preheat oven to 350 degrees F. Spray 8x8-inch pan with nonstick spray and then line the bottom with parchment paper.
Heat butter in a small saucepan over medium heat until it browns and begins to smell nutty (watch it closely so it doesn’t burn). Let the butter cool for a few minutes, until just barely warm.
In a large mixing bowl, combine the browned butter and sugars. With a wooden spoon, stir in egg, vanilla and salt. Stir in flour, coconut and M&M’s until batter is blended.
Pour the batter into the prepared pan and smooth the top with a rubber spatula. Sprinkle a few additional M&M’s on top. Bake 25 to 30 minutes. Let the bars cool before turning them out onto a cutting board and slicing into squares (chilling them will make that process even easier).

Saturday, February 4, 2012

Sausage Macaroni Skillet

One of Matt's favorite dishes and pretty simple to make.


Sausage Macaroni Skillet
1 lb bulk Italian sausage
1/4 cup chopped onion
1/4 cup chopped green pepper
1/4 cup chopped red pepper
2 cups uncooked elbow macaroni (I used whole wheat pasta)
2 cups water
1 cup chili sauce
1 can (5oz) evaporated milk
1/2 cup shredded cheddar cheese

In a large skillet, cook the sausage, onion, and peppers over medium heat until meat is no longer pink - drain.  Add macaroni and water.  Bring to a boil.  Reduce heat; cover and simmer for 7-8 minutes or until pasta is tender.  Stir in chili sauce and milk and bring to a boil.  Reduce heat; simmer, uncovered, for 3-4 minutes or until heated through.
Remove from heat, sprinkle with cheese.  Cover and let stand for 5 minutes or until cheese is melted.
Serve with a steamed vegetable like green beans to make a balanced meal. :)

Monday, January 30, 2012

Energy Bites

Tried this Pinterest recipe this morning after getting back from the fitness center - I think the title, "energy bites" is a little misleading... think of them more as a delicious, easy to eat snack that isn't too terrible for you. :)

You read that picture right - No- Bake.  What does that mean???  Easy to whip together.


"Energy Bites"
In a large bowl, mix together all of the following:
1 cup Oatmeal
1 cup flaked coconut
1/2 cup ground flax seed
1/2 cup peanut butter
1/3 cup honey
1 tsp vanilla
1/2 cup mini-chocolate chips
Chill in the fridge for 30min. then roll into 1 inch balls and store in air tight container.

Some of these ingredients can be changed - for example, I would try using raisins instead of chocolate chips and wheat bran instead of ground flax seed - or whatever you like.
Enjoy!

Cinnamon Swirl Cupcakes

Eat your heart out Cupcake Contest!

I have never been a "cupcake baker."  I never saw the point - just make the whole damn cake and be done with it.  I thought cupcakes were tedious.  And they still kind of are...however, at school there is an upcoming "Cupcake Contest" on Valentines Day for any staff to participate in.  Now, I love to cook, I love to bake, and couldn't really pass up a contest so I researched and found a few cupcake recipes I'd be willing to try - here is one!

Now, for those of you fellow employees - don't be thinking I'm automatically doing this recipe for the contest - I wouldn't give away my secrets - but this was a darn good recipe and totally worthy of sharing on my blog.  :)


Now I'm kind of cheating...but I didn't really want to re-type the whole recipe so I've just pasted the website where this AMAZING recipe can be found.  Check it out!
I will suggest though to cut down the frosting recipe - maybe even cut it in half.  My batch of cupcakes only made 19 and I had a TON of frosting left over - so go ahead and cut it in half unless you want a TON of frosting. :)

Another suggestion I have - and to make some things a lot simpler - but a cinnamon sugar mix.  This recipe calls for a sugar, brown sugar, and cinnamon mixture and some extra cinnamon sugar mix for topping.  I found this coarse sugar and cinnamon grinder at our World Market - very similar to a Trader Joe's but with home items as well as ethnic/less common food.  The World Market also has a great variety of wines and beers and some really great kitchen utensils I will have to show you in another blog.
I'm sure you could find another brand of cinnamon/sugar mixture at a Hyvee or Target, etc - probably won't be a grinder though.
Just a suggestion!


Tuesday, January 24, 2012

Slow Cooker Stroganoff

Here's an easy recipe we tried to save time on cooking after Matt's basketball game tonight.  It's always incredibly salivating, (I just made up that phrase), to come home to a slow cooker meal ready to go.
Another plus to this recipe is the loot of frozen streaks we still have in our freezer.  I recommend half a cow as a very reasonable, usable gift for anyone!

P.S. Once again, this is NOT my picture...sorry to disappoint.  Thank you tasteofhome.com for great recipe ideas!
\

Slow-Cooker Beef Stroganoff
2lb beef stew meat (we used 2lb of round steaks)
1 onion, chopped
10oz fresh mushroom, halved (we did not use these...I don't like mushrooms)
1 clove garlic, minced
1 cup beef broth
2 tsp Paprika
1 tsp salt
1 cup sour cream
1 Tbsp Dijion mustard
2 Tbsp flour
1 pkg (16oz) egg noodles
2 Tbsp chopped fresh parsley

Cut beef into 1 inch bite size pieces.  Add to slow cooker with onions and optional mushroom with paprika, salt, and garlic.  Pour in beef broth.  Cook on low for 7-8 hours.
Mix together sour cream, flour, and mustard.  Stir into ingredients in slow cooker until well blended.  Cook, covered, on low 15min.  Meanwhile, cook noodles according to package.
Drain noodles; place in large serving bowl.  Add meat mixture; mix lightly.  Sprinkle with parsley.
I just turned off the crock pot and stirred the noodles into the crock pot.  Saved me a serving bowl to wash. :)

Sunday, January 22, 2012

Tomato Basil Pasta

Here's another Pinterest find, and the best part???  SO quick and easy!!!


Super Quick Tomato Basil Cream Pasta
1 large can crushed tomato
1/2 Cup Raw Cashews
2 Tbs Olive Oil
2-4 Cloves Garlic, minced
1 box or a little less Whole Wheat Spaghetti
1 tsp Salt
1-2 tsp Freshly Cracked, Coarse Black Pepper
1 Large Handful Fresh Basil Leaves, chopped (I didn't have these so I used dried basil)

Put a large pot of salted water on to boil.
Blend cashews in blender until finely chopped.
Add olive oil to a large saute pan over medium-high heat. Add garlic and saute until golden, being careful not to burn. Once water is boiling, add pasta. Add crushed tomato to saute pan with cashew and basil and bring to a simmer. Add salt and let cook for 4-5 minutes, stirring occasionally.
Let simmer until pasta is finished cooking. Once pasta is cooked, drain. Add pasta to the saute pan with black pepper and freshly chopped basil leaves. Toss to coat. Serve immediately, garnishing with more pepper and basil.

Tuesday, January 17, 2012

Pinterest & Garlic

I LOVE Pinterest!  Maybe a little too much - kind of distracting.  My favorite thing about it is the recipes!  I find SO MANY great recipes to try and the following was the first recipe I tried off Pinterest.  The picture is from Pinterest - not my kitchen :) 

P.S. If you're not on Pinterest you should let me know and I will "invite" you to join and you will become addicted!


Garlic Scallion Noodles
1 box either angel hair or spaghetti noodles
5-8 Tbsp butter (a full stick is a little too much - I would go with maybe 5 next time)
8 cloves of garlic, minced or pushed through a garlic press
4 scallions finely chopped
4 Tbsp soy sauce
2 Tbsp of brown sugar (less or more based on your own personal preference of sweetness)

Cook pasta according to package directions. Drain and rinse.
In a heavy skillet over medium heat. Melt butter. Add scallions and garlic. Stir and cook, without browning the garlic. Cook until the garlic smell is fragrant and filling the room, about 5 minutes. Add sugar and soy sauce, and cook for another minute. Increase the heat a bit and throw in the noodles. Quickly saute the noodles until they are all coated with the garlicky butter mixture.
Serve immediately. Garnish with additional scallions if desired.

This recipe can be added to as desired.  Matt suggested using a meat next time - chicken or steak strips - really anything. :)

Monday, January 16, 2012

Christmas Treats

This year for Christmas, just like Thanksgiving, was a little different.  My family's tradition is Christmas Eve and a BIG seafood feast.  We were unable to get to my parent's house this year for the traditional New England dinner, so we attempted our own!  I also made my first double layered, homemade cake for Christmas at my uncle/aunts while my Grandpa was visiting from Vermont.

The special thing about bringing this homemade cake to Christmas with my Grandpa and my dad's youngest sisters' house with her family was the cake plate I brought it on.
This cake plate was given to Matt and I from my Grandpa at our wedding.  It was a wedding gift to him and my Grandmother on their speical day and is over 50 years old.  One of my most special possessions.

This cake was incredibly delicious but not the easiest thing to make.  Warning: only attempt if you have baking-patience and some time!
Another note, this is supposed to be a FOUR layer cake but I only had 2 round cake pans so I made two layers...and I made them at about 11:00pm at night so I wasn't thinking and used the same amount of batter...NOT the best idea.  If you want to make the 4 layers, go for it!  If you want to do 2 layers, cute the recipe in half!

Fudgy Peppermint Stick Torte
(remember cut in half if you want 2 layers like I did, otherwise make 4 layers)
1-1/2 cups butter, softened
3-1/4 cups packed brown sugar
4 eggs
2 tsp vanilla
4 cups flour
1-1/4 cups baking cocoa
2 tsp baking powder
1 tsp salt
1 tsp baking soda
2-1/2 cups cold water
Filling:
1-1/2 cups heavy whipping cream
1/2 cup confectioners' sugar, divided
1/4 tsp peppermint extract
1 pkg (8oz) cream cheese, softened
1 cup crushed peppermint candies, divided (A neat thing I found at Target this year was a jar of these, already crushed, kind of like a sprinkles(jimmies) container - time saver!)

In large bowl, cream butter and brown sugar until light and fluffy.  Add eggs, one at a time, beating well after each addition.  Beat in vanilla.  Combine the flour, cocoa, baking powder, salt, and baking soda; add to the creamed mixture alternately with water, beating well after each addition.
Transfer to four (or 2 if cutting recipe in half) greased and floured 9inch round baking pans.  Bake at 350* for 18-22minutes or until a toothpick inserted comes out clean.  Cool for 10 minutes before removing from pans to wire racks.  Cool completely.
In small bowl, beat the cream until is begins to thicken.  Add 1/4 cup confectioners' sugar and extract; beat until soft peaks form.  In another bowl, beat cream cheese and remaining sugar until smooth.  Fold in whipped cream, then 3/4 cup crushed candies.
Place bottom cake layer on a serving plate, top with 1/4 of filling;  Repeat layers 3 times.  Refridgerate for a least 1 hour.
Just before serving, sprinkly remaining candies over top.  (I skipped this part - sometimes they bleed right away)


The other dish I made was our version of the "seafood family feast" for Christmas Eve.
We baked a nice haddock fillet from HyVee and bought 1 lb large shrimp for the pasta.  This is a pasta we make a lot using 1 bag frozen, cooked, peeled shrimp.  Very convient and easy!

Shrimp & Tomato Linguine Toss
1 pkg linguine noodles (we like the whole grain)
1 lb shrimp or 1 pkg frozen, small, cooked shrimp - be sure to gently pull the tails off, much easier to eat that way - also check that the tails are fully cleaned
3 garlic cloves, minced
1 Tbsp, olive oil
1 can fire roasted diced tomatoes, undrained
2 tsp minced fresh basil, or 1/2 tsp dried basil
Dash pepper
1/2 cup crumbled feta cheese
Additional minced fresh basil, optional
1/4 cup Zesty Italian Dressing, optional

Cook linguine according to package.  Meanwhile, in large skillet, heat either the olive oil or the dressing with minced garlic.  Add shrimp and warm through - approximatel 2-3 minutes.  Add tomatoes, basil, and pepper.  Bring to a boil; cook and stir for 1-2 minutes or until heated through.
Drain linguine; toss with tomato mixture.  Sprinkle with feta and additional basil if desired.


Saturday, January 14, 2012

First Thanksgiving

Because we were in the process of moving for a few months we were best friends with our crock pot. :)  Sometimes I wouldn't get back from painting our new place until 11 or 12pm.  When we finally moved into our place we didn't have a kitchen to use because we were getting new flooring in the kitchen, so there wasn't a lot of opportunity to cook - I missed that.
So, one of our first times back to cooking together, like we love to do, was our first Thanksgiving with just the two of us.  Normally we travel to my parents house for Thanksgiving dinner, but plans changed this year and we tried our own dinner - it was DELICIOUS and exciting!

With only the two of us, I tried a turkey breast and then got the idea to do it "chicken fried steak" style.  Matt cleaned it and we pan fried it and made a gravy as well.  It looks a little well done in the picture, but it tasted really good!

Country Turkey with Gravy
3/4 cup crushed cornflakes
1/2 tsp poultry seasoning
1/2 tsp paprika
1/4 tsp dried thyme
1/4 tsp salt
1/4 tsp pepper
2 Tbsp fat free evaporated milk
1 turkey breast - or you can use 4 boneless skinless chicken breast halves
2 tsp olive oil

Gravy:
1 Tbsp butter
1 Tbsp flour
1/4 tsp pepper
1/8 tsp salt
1/2 cup fat free evaporated milk
1/4 cup condensed chicken broth
1 tsp sherry
2 Tbsp minced chives (I didn't use these)

In a shallow bowl, combine first 6 ingredients.  Place milk in another bowl.  Dip turkey in milk then roll in cornflake mixture.
In large skillet(I used a cast iron because the turkey was thicker than chicken and I thought I'd have to finish it in the oven - if using chicken breasts use a nonstick skillet) coated with cooking spray, cook turkey in oil over medium heat for 6-8 minutes, or more, until meat thermometer reads 170*.  We finished ours in the oven once the sides were crisp.
Meanwhile, in small saucepan, melt butter.  Stir in flour, pepper and salt until smooth.  Gradually stir in milk, broth, and sherry.  Bring to boil - cook and stir 1-2 minutes or until thickened.  Stir in chives.  Serve with turkey.


Also, with only 2 of us, we didn't need a ton of sides so we chose two.  We both love sweet potatoes and I had just watched the Food Network's Thanksgiving special and so the following recipe is from Bobby Flay.   Mmmmhhhhh...Bourbon...I really wish I wouldn't gotten a picture of the flames we created from burning off the bourbon...I thought our new kitchen was toast! :)

Bourbon Sweet Potatoes (this made A LOT of potatoes!)
1 stick unsalted butter
3/4 cup molasses
1/2 cup light brown sugar
pinch Cayenne
1 cup bourbon
Salt and ground pepper
8 large sweet potatoes par cooked and cut into 2 inch diced pieces
3/4 cup tasted pecans (I didn't use these but they sound wonderful)

Heat oven to 375.  Combine butter, molasses, brown sugar, and Cayenne in medium saucepan and cook over medium heat until smooth about 5 minutes.  Increase heat to high, add bourbon and cook for 2 minutes to allow alcohol to burn out.  (This is where we had trouble because we have an electric stove - so we lite a march over the bourbon mixture and it took a few times until it caught...BIG flames.  Once it cooked 2 minutes I had to put the lid on the pan to dampen the flames!  Gas stove might be easier...???)
Season with salt and pepper.
Add potatoes in pan (we were using a large saute pan).  Turn and cook potatoes until glazed - medium-high heat.


And our final side was a vegetable bake, because we both love vegetables...especially with cheese!

Baked Parmesan Broccoli (with Cauliflower)
4 bunches broccoli, cut into florets (I used half broccoli half cauliflower)
6 Tbsp butter, divided
1 small onion finely chopped
1 garlic clove minced
1/4 cup flour
2 cups milk
1 egg yolk, beaten
1 cup grated Parmesan cheese
1/2 tsp salt
1/8 tsp pepper
1/2 cup seasoned bread crumbs

Steam broccoli and cauliflower in steamer basket over 1 in boiling water in pan 3-4 minutes until crisp-tender.  Might need to do two baskets to fit in all veggies.  Then place in greased 13 x 9in baking dish. 
Meanwhile, in small saucepan over medium heat, melt 4 Tbsp butter.  Add onion, cook and stir until tender.  Add garlic, cook 1 more minute.  Stir in flour until blended, gradually add milk.  Bring to boil; cook and stir for 2 minutes or until thickened.  Stir a small amount of hot mixture into egg yolk - so it doesn't scramble, and return all to pan - stir constantly.  Cook and stir 1 more minute - remove from heat; stir in cheese, salt and pepper.
Pour over broccoli/cauliflower  In small skillet, cook bread crumbs in remaining butter until golden brown; sprinkle over top.
Bake uncovered at 400* for 15-18minutes or until heated through.


All in all a successful first Thanksgiving!  Looking forward to next year!

I'M BACK!!!

Well, at least I didn't go a full year without posting... :)

Here's the thing, I last posted right at the end of the school year and then summer hit and we got busy.  And I thought to myself, "When summer is over I'll get back into blogging again."
Then, summer was over and school started back up and we got busy with football and marching season :) (cause you know we're both teacher's and we love those fall activities), AND we got busy with Moving!
We FINALLY found a bigger rental and are very excited to finally be settled into our new house.  We love the extra space, the new furniture we now have room for, all the parties we get to host now, and our cat Robby is finally comfortable in the new area.
I especially LOVE the new kitchen which is WAY bigger than our old kitchen and has A LOT more room for cooking/baking!


So, summer time.  Matt was busy shingling and I was busy with summer band lessons.  We both competed in 2 road races again this summer and worked hard training for those. 


We also both became Aunts and Uncles for the first time - congrats to Mike and Leah and baby Kelsey!

Our biggest summer event was our 2 week vacation in Maine.  We traveled with my parents and stayed with my Grandpa.  Also got to spend our 1 year anniversary at the same beach where we spent our honeymoon - PERFECT!


Of course, being in Maine, we ate A LOT of FRESH seafood.  Grandpa does a great job of cooking amazing dishes for us.  One of our best nights was our "seafood feast" and Matt's first experience with lobster!


We also cooked up our own Pollock and Cod from our Deep Sea Fishing trip off the Maine coast.  Definitely a "once in a lifetime opportunity" because we are NEVER doing that again!  At least we didn't throw up for the full 10 hours like my dad...ew!  But, BEST fish I've EVER eaten!


So I guess there's a peak at our busy summer - not much of an excuse not to blog, but for all of you loyal fans and friends, I am BACK and stay tuned for some great new recipes!